Page 2 of 2

Re: ICE ICE POLO (ROBolop Design)

Posted: Fri Jan 04, 2013 4:31 pm
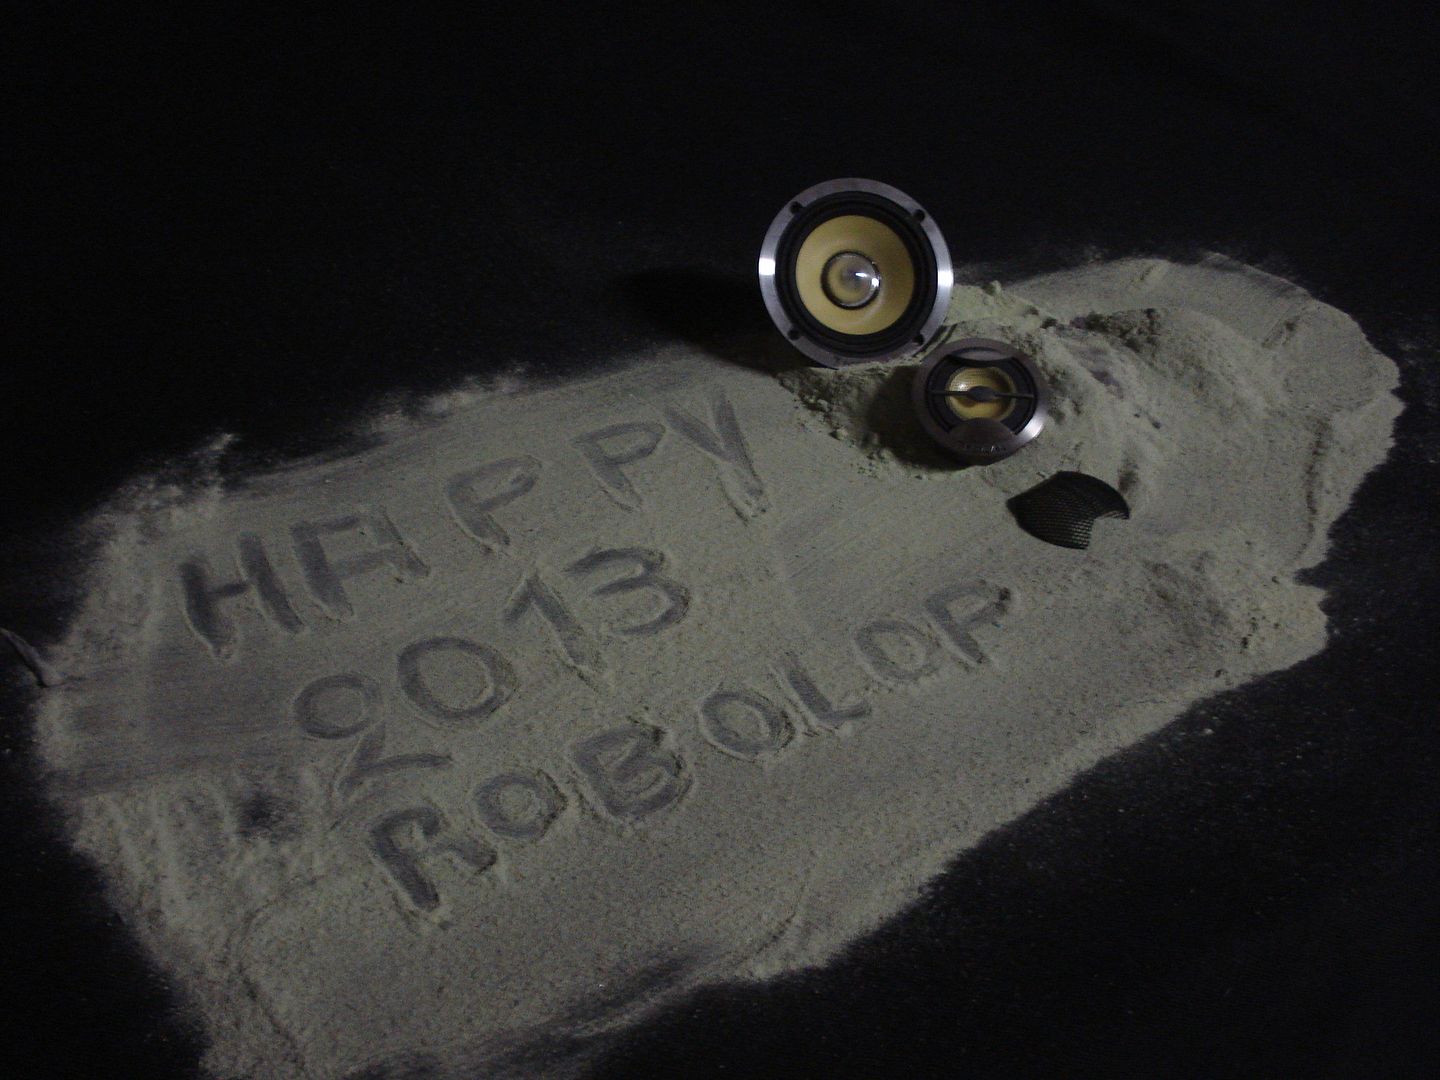
by robolop
Image

Re: ICE ICE POLO (ROBolop Design)

Posted: Sat Jan 05, 2013 12:05 am
by robolop
I let someone make me a set of alu little busses, to go in between the amp and the EQ.

Image

Image

Image


I'm planning of polishing these, so they shine like a mirror. Like that I'll get a nice contrast with the matt alu plate on the bottom.

Image

The 4 who are a bit longer, holds everything that's on the amplifier, in place.

Image

Image

Image

This will be the coverplate which will rest on the glass.
I made this one in 8mm thick MDF wood.
Off-course I made the 2 holes as big as possible, so you can see as much as possible of the install.

Image

Image

Because the middle of the coverplate is quite wide, I was afraid that I'd loose the effect to see from the front, to the back. But it's really ok, it's still looks fine.

Image

Off-course I'm going to add some lighting in there too.
Here are a couple of things I picked up from the motorhos in Essen (DE)...

Image

ICE ICE POLO (ROBolop Design)

Posted: Sat Jan 05, 2013 7:48 am
by Drock
The bar just keeps getting set higher. Very nice work.


Sent from my iPad using Tapatalk HD

Re: ICE ICE POLO (ROBolop Design)

Posted: Mon Jan 07, 2013 4:04 am
by robolop
Everything I made for in the back of this Polo thus far, is removed from the trunk now. So I can give the trunk a good clean now.

Image

The meaning now is to rebuild everything the install, outside of the trunk. But there’s a lot of work to be done first.
Some of the iron, aluminium I used, will be sanded off, and sprayed black.
The wooden box, which holds all of the components, will be glued together. The aluminium on the bottom will be glued tight with TEC7.
I was planning on making a carbon plate for it, but where I’m working now, it’s too moist, and I’m afraid it won’t be perfect…So I’ll have to come up with something else.
I also need to mill some other sloths in the bottom of the box, where the cables are.
These sloths go towards the sides, but if I look at it now, I just haven’t got space to place my cables there. Pretty stupid of me, I should have known.


Everything is ready to be covered in skai-leather, but I just can’t. Because it’s a daily car, we’ll have to use the trunk to place all our purchases in.
This means, when I buy some wood (or whatever), I have to put it there. It’s not possible to always put a blanket in there, being scared of scratchin’ it a little.
The best thing I can do is to cover it in to find the same piece of cloth the trunk is made of, and cover it in that.
Offcourse, that will look like SHIIIIIIIIIIIIIIT, but then again, maybe I should have left it like it was.


Sometimes women are right…SOMETIMES I said

Image


I’ll sleep another night on it, before I open a bottle of glue.


Image

Re: ICE ICE POLO (ROBolop Design)

Posted: Mon Jan 14, 2013 10:02 am
by robolop
Lowcountrypsulion wrote:Wow! Nice work. Do you want to redo my trunk? :wink:

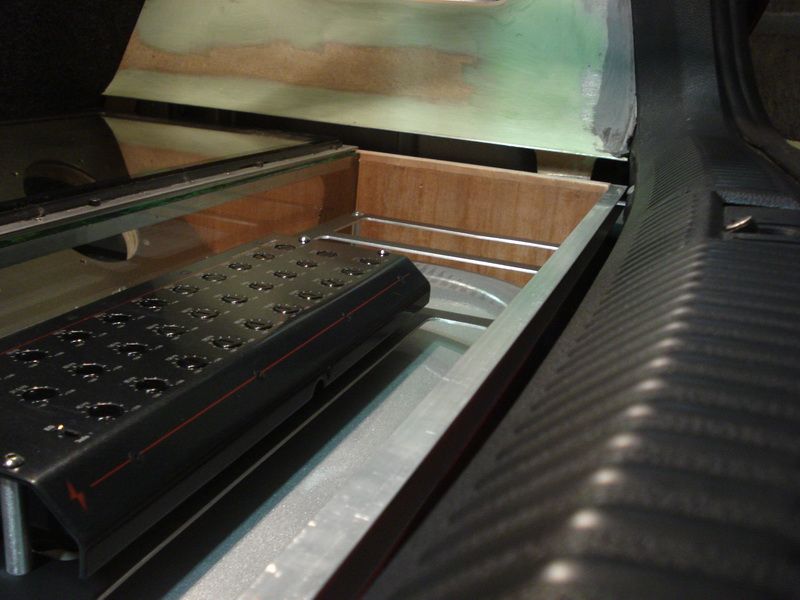
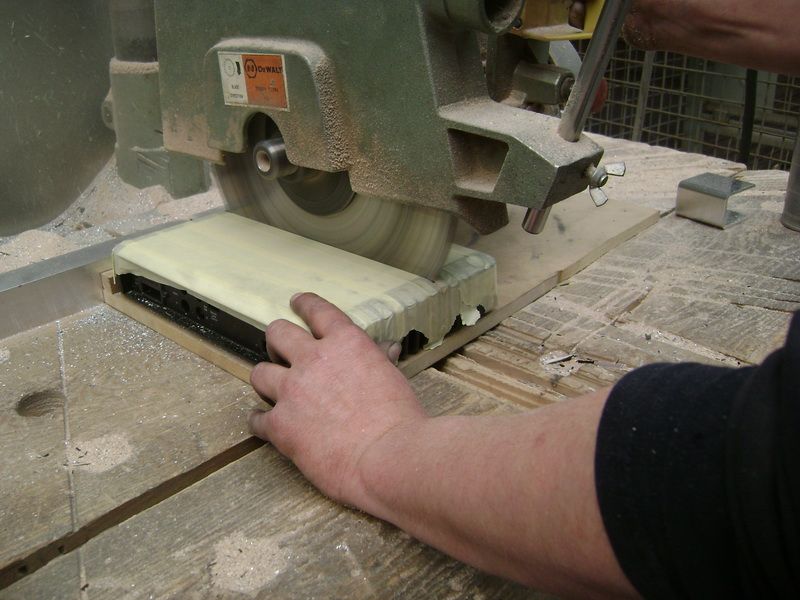
Also, I can't believe you cut that DEQ in half. Those are getting hard to come by.

No dude, I already got too much work on my hands, building this trunk.
There are more things I cut through lol, and no, I’m not a magician, lol

Image

Image

Re: ICE ICE POLO (ROBolop Design)

Posted: Mon Jan 14, 2013 10:03 am
by robolop
ttocs wrote:how long did this build take you or how long have you been working on it?
I can’t give a perfect answer on this question… I don’t have a clock in my garage, and when I’m working on something, I don’t give a f*ck about time.
If it turns out good, I’m satisfied.
Image

Re: ICE ICE POLO (ROBolop Design)

Posted: Mon Jan 14, 2013 10:05 am
by robolop
Drock wrote:The bar just keeps getting set higher. Very nice work.


Sent from my iPad using Tapatalk HD
For a daily car, the bar is set high enough.

:metal: :metal: :metal:

Re: ICE ICE POLO (ROBolop Design)

Posted: Mon Jan 14, 2013 11:44 am
by ttocs
robolop wrote:
ttocs wrote:how long did this build take you or how long have you been working on it?
I can’t give a perfect answer on this question… I don’t have a clock in my garage, and when I’m working on something, I don’t give a f*ck about time.
If it turns out good, I’m satisfied.
Image
I am the same way myself, my mustang has been apart since nov with my current project. Just wasn't sure if you started it a month ago, a week ago, a year ago....

Re: ICE ICE POLO (ROBolop Design)

Posted: Tue Jan 29, 2013 9:07 am
by robolop
In despite of the cold weather, I went and buy some things I needed to finish the trunk of the Polo.
I also found almost the same fabric as the original one from VW (90% the same).
This was (at least for me) the best I could find. I know that it would have been much prettier when I would have covered it in leather, or alcantara, but I just couldn't. This is a daily car, and the trunk has to be used.

Image

I also bought some RCA cables from Dietz

Image

Fuse-holder for in the front.

Image

This self-adhesive (hard) mousse I'll tape on the aluminium that comes on top of the install.

Image

The aim is to have a good closure of the subbox.
On the cover of the amp, I'll also stick this, so it can't vibrate.

This self-adhesive 2mm rubber will get in between the rings of the speakers, and the aluminium.
Also to prevent vibration.

Image

Image


I also got the O-ring for the finishing touch.

Image

As for the material, I've got everything to finish the trunk.
The biggest problem now it the cold weather. I went over there to take some pictures, and check a few things, but after a few mintues, I was almost completely frozen.
So I'll have to wait for better temperatures to continue this project

Re: ICE ICE POLO (ROBolop Design)

Posted: Tue Jan 29, 2013 1:35 pm
by marko
nice work as ever! but will it ever be finished!! I look forward to the updates :)

Mark

Re: ICE ICE POLO (ROBolop Design)

Posted: Wed Jan 30, 2013 3:32 am
by robolop
marko wrote:nice work as ever! but will it ever be finished!! I look forward to the updates :)

Mark

I don’t know why I shouldn’t finish this. Everything needs time to get finished, some more than others, no?

Re: ICE ICE POLO (ROBolop Design)

Posted: Wed Jan 30, 2013 5:55 am
by ttocs
I have to wonder if mine will ever get done from time too time. I got time though, take yours don't rush it.

Re: ICE ICE POLO (ROBolop Design)

Posted: Mon Feb 04, 2013 4:20 pm
by robolop
I’m back in business! The goal now is to complete the entire sub-box.

First off all, I sanded the aluminum parts, in which the cables run through, firmly, because I was going to polish them.
I did the solid bar first, because I would take longer than the rest.

First I sanded it with the machine, this with a 240.
After that, with a wet 600, then 800 – 1200, and I stopped with a 2000. When I completed all of these steps, it was 2 hours later.

To do this in a safe way, I screwed the ruler on a piece of wood. By doing this you exclude the possibility to burn your hands when holding the wood, and it’s almost impossible that your piece hits the brush.
You can also see that I taped the plank with tape. I do this always so my brush isn’t full with wood splinters, and so you can’t make any scratches.

Image

As for the little parts, I needed to come up with something.
And I found a simple way to fix this.

The piece on the right needed polishing, and on the left you can see how I screwed it.

Image

Off course I also needed to go through all the sanding steps, but this went pretty easy.
I placed this in my drill machine, and let it spin.
So I just had to place the sanding paper against it, and keep it wet.

Image

On the right you can see the sanded piece.

Image

Then this had to get polished too, so I clammed a pliers on it.

Image

So you can hold the little piece against the brush in a safe way.

Image

On the left the result

Image

This was everything that needed to get polished for the subbox.

Image

For those who want to polish something, be carefull with this! And don’t use a big brush.
If you have a descent motor (about 4hp), with a big brush, you have a fat chance that the piece will bite the brush pretty hard, and you’ll feel a big slap in your arms

Image

I also added some LED lights in the box.

Image

I also mounted the self-adhesive mousse, so the box will be tightly closed.

Image

Re: ICE ICE POLO (ROBolop Design)

Posted: Tue Feb 12, 2013 2:25 pm
by robolop
The first piece of the polo-ice, is ready, the sub box. yihaa

Image

Image

Image

About the connections, I’m very pleased I’ve done it like this...

Image

I thought everything will go much smoother by making this so, but you can forget it.
I had a huge amount of work trying to mount it all nicely, and getting it all aligned.

Image

The O-rings are the finishing touch in my opinion.

Image

The cables were the things I had the most amount of work on. These need to be placed in the same line, and then again, have the same curve. To do this I made a couple of cardboard molds and checked for over 500 times if everything was correct.
This was something people would have a comment on like “cool, but the cables are not all the same, and offcourse, I want to prevent that to happen in any way

I spread the 4 connections over 3 days. I mean, when you checked something about 300, you make yourself crazy, and you don't see little errors anymore.
The day after, you immediately see something appear, and the day after that you can make it for 100% perfect.
You can judge yourself, but the picture doesn't give a perfect image, cause it wasn't possible with my camera to put they all in one row.

Image

When you look at the connection in the front, it seems like this is morde round than the other one, but that's not true.
I'm pleased how it looks now, but I've put a lot of work in this little box.
I added some lights too, and it sure looks nice (if I may say so myself), but I'm going to wait some more before posting this


The subs are hooked on, and the next thing I'm going to do is to mount the box in the polo.
The amplifier is going to be hooked on when it's mounted in the car. It will be much easier to work on.

Up to the next..

Re: ICE ICE POLO (ROBolop Design)

Posted: Tue Feb 12, 2013 4:31 pm
by vladthebad
Holy mother of god that looks great. I was wondering how it'd all look wired up.... Fantastic....

Re: ICE ICE POLO (ROBolop Design)

Posted: Tue Feb 12, 2013 5:59 pm
by oldskoolmseriesfan
:drool: :drool: :drool: :drool: :drool: :drool: Thats all!!! Unreal skills ROBolop... you dont see attention to detail as much as we would like too now-a-days, but I think you have more than made up for that with this build!!!

Re: ICE ICE POLO (ROBolop Design)

Posted: Tue Feb 12, 2013 6:31 pm
by AVICJR
DAMN!!!!!!!!!!!!!!

That is all!

Re: ICE ICE POLO (ROBolop Design)

Posted: Thu Feb 14, 2013 3:34 am
by robolop
I’ve taken some pictures of the subbox with the lights on. This wasn’t that simple. Once it’s all finished, I’ll ask a friend of mine, who has some professional material, to do a shoot for me.
He took shots from the interior-lighting from the bimmer last year, and that was BAM!

As you can see I chose red. The interior lighting is also red and white, but white sounded a bit “boring” for me.


Image


Image


The only thing I can’t stand, is the reflection of the LED’s in the polished bar.


Image


Image


I had this in the bimmer too, that’s why I’m going to experiment with this problem…


Image


Image


Image

If I can trust the weather-man here in Belgium, it’s going to get pretty cold again…so the thing is that I’ll have the put the works on pause again

Re: ICE ICE POLO (ROBolop Design)

Posted: Thu Feb 14, 2013 4:47 am
by marko
looks stunning my friend, stunning!

Re: ICE ICE POLO (ROBolop Design)

Posted: Thu Feb 14, 2013 10:04 am
by oldskoolmseriesfan
Wow dude!! Your complaining about the reflections?!?!? LOL!!! Great job dude, it takes my breath away!!! I cant wait to see this project in its entirety!!

Re: ICE ICE POLO (ROBolop Design)

Posted: Thu Feb 14, 2013 1:23 pm
by ttocs
take a piece of plexi and sand it so that it has a cloudy haze on it and mount it infront of the leds to spread the light a little more through out the area.

Re: ICE ICE POLO (ROBolop Design)

Posted: Thu Feb 21, 2013 9:33 am
by robolop
I was sick for a couple of weeks, but now I’m cured, and ready for take-off!
At least, I thought I was…till I saw there was a crack in the glass.

Image


After some swearing I screwed it loose.
I thought “let’s cut it loose from the aluminium, but damn, was that disappointing”

Image


The easiest thing to do was to crush it all with a hammer, and then cut the Tec7 through with a nice.
A really sh*tty job


Of course I had to find the cause of this problem, and I found it immediately. The alu framework, where the glass rests upon, isn’t 100% equal, so it’s normal that it broke.
Now, I rather have this going bad now, then when it’s all finished.

The glass is ordered, and tomorrow I’m going to do it all over again.


sh*t happens

Re: ICE ICE POLO (ROBolop Design)

Posted: Thu Feb 21, 2013 10:57 am
by ttocs
I thought it was plexi myself and with that being part of the enclosure it probably should be honestly. Its going to flex no matter how small so unless you have that frame PERFECTLY flush with it I think you will end up replacing it again.

Re: ICE ICE POLO (ROBolop Design)

Posted: Mon Mar 11, 2013 1:30 am
by robolop
I’ve started covering the parts for in the trunk.
The alu part you see in the hole, is the plate I made so the little door will not be able to shift backwards.

Image

Here the little door when it was freshly sawn, just need to cover it. The plate harnesses itself in the hole, and I’ll tell you how to take it out, once it’s covered in clothing.

Image

This is the left side

Image

Image

I covered this last night, and where I’m working now, I haven’t got so much ligt. So when I looked at my work outside today, I… @$esd)!
Here you can see why.

Image


The colour of the lower part is a bit more dark , and I didn’t see that. I bought 2 rolls of fabric, and apparently it wasn’t the same color.
So I’ll have to start again.


Every disadvantage has an advantage … Now I’m going to know how strong the glue is I’ve used


F-ckin’ hell!