The beginning's of my carputer install

Need help with your car stereo system? Have a technical question? Post here.
User avatar
Jacampb2
Mad Scientist
Posts: 1562
Joined: Sat Apr 19, 2008 11:57 pm
Location: Beaverton 48612

The beginning's of my carputer install

Post by Jacampb2 »

I have been messing with this on and off for a few years. the original plan was to use a data911 mobile computer I picked up for cheap, it is purpose built for mobile use but it was just not powerful enough for what I wanted.

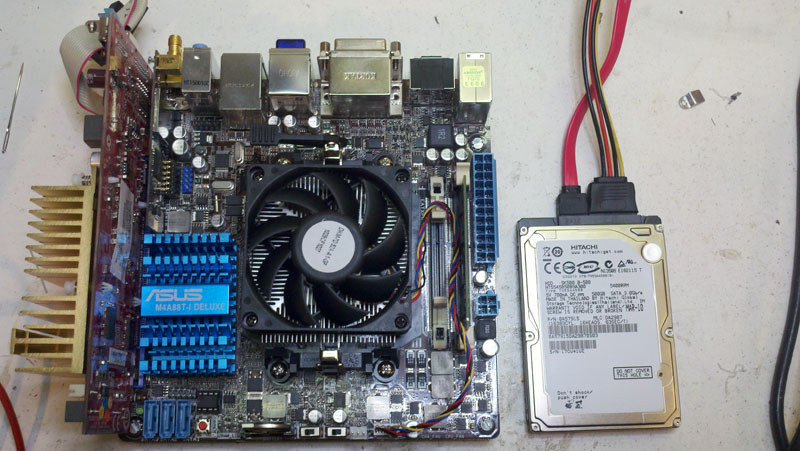
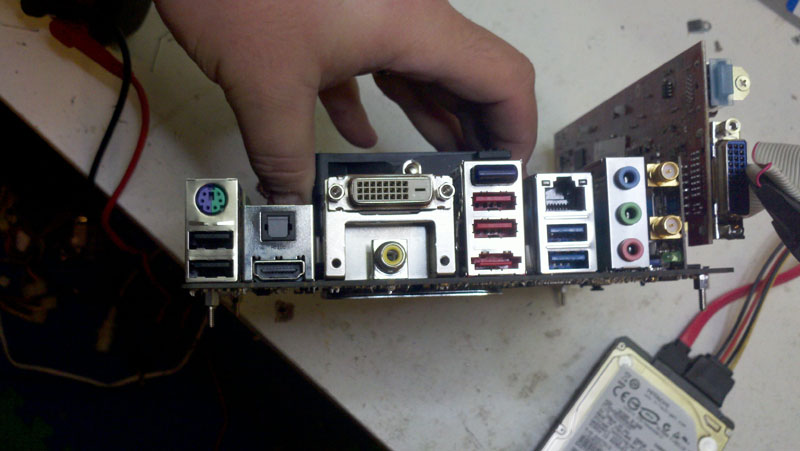
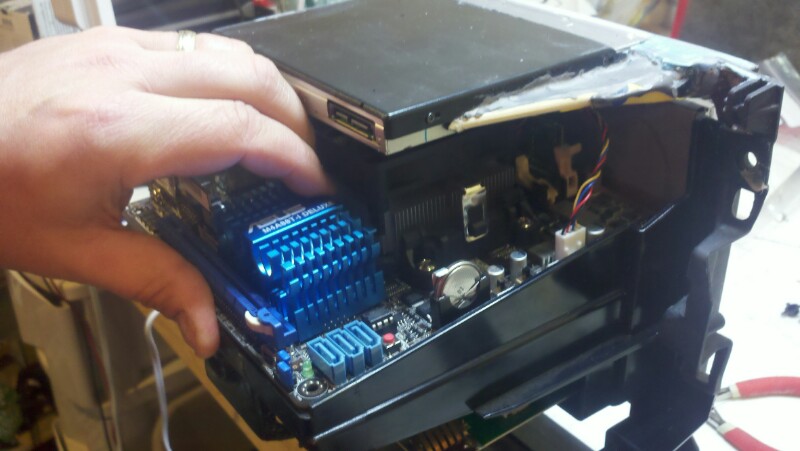
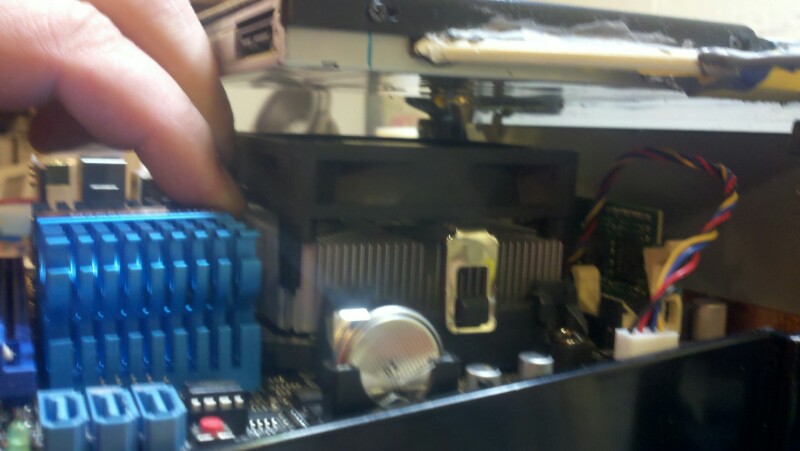
New Plan: I bought a mini itx mobo, dual core 3ghz processor, 500gb sata II notebook drive, 2gb ram and win 7 ultimate. I've had this one up and running for about a month, and I like it a lot better, lol. It has on board video, but only hdmi and dvi-d outputs. I had to buy a pci-e video card for it because my little lilliput monitor was already purchased and it was analog video only. So, I now have the capability of running up to 4 independent monitors if I want to.

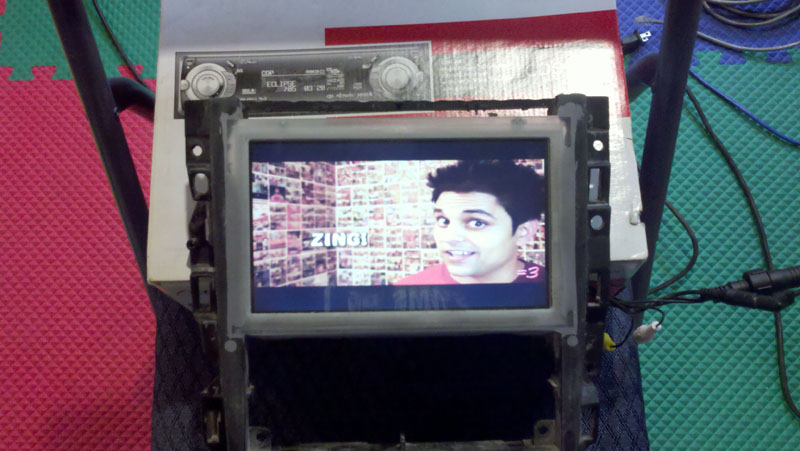
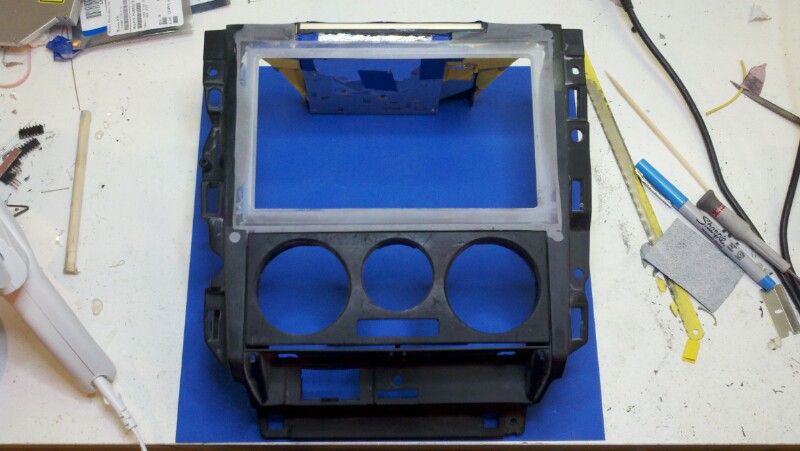
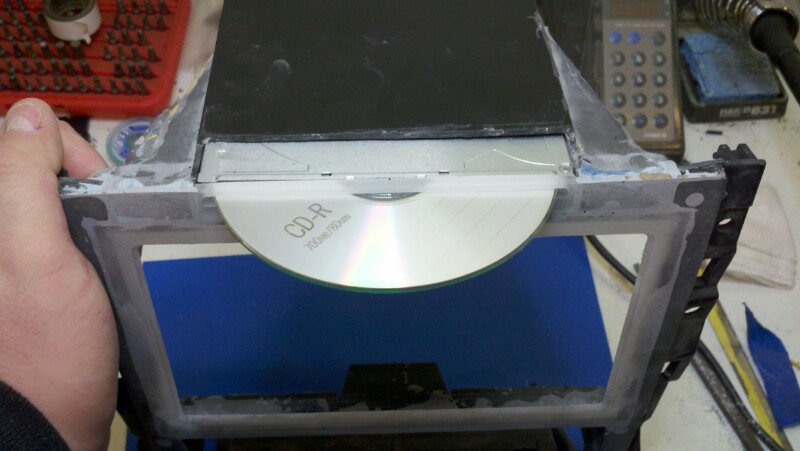
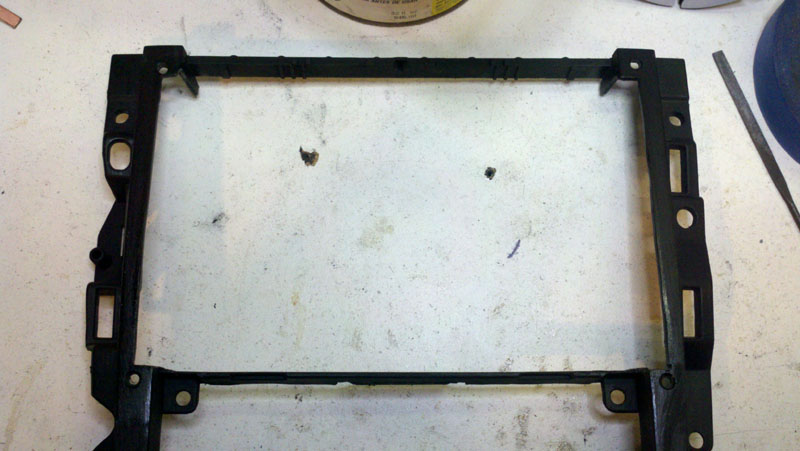
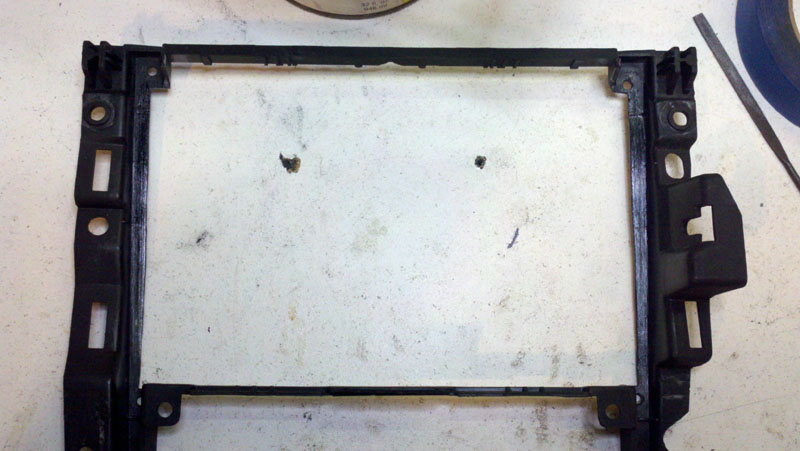
So, I bought a lilliput 8" widescreen touchscreen monitor. I planned to flush mount the monitor in the double din opening. I got a really good deal on the 8" monitor-- in hind site I should have rolled with the more common 7" wide screen. the 7" monitor fits easily in a DD opening. I ended up having to buy a new dash trim piece and cutting it up to fit.

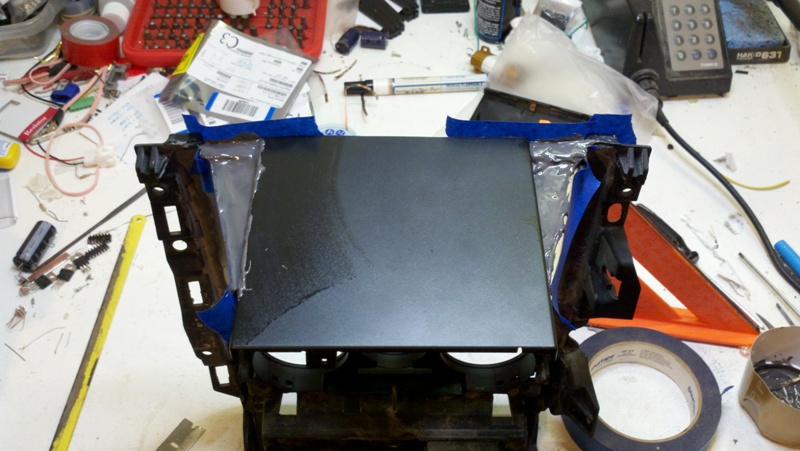
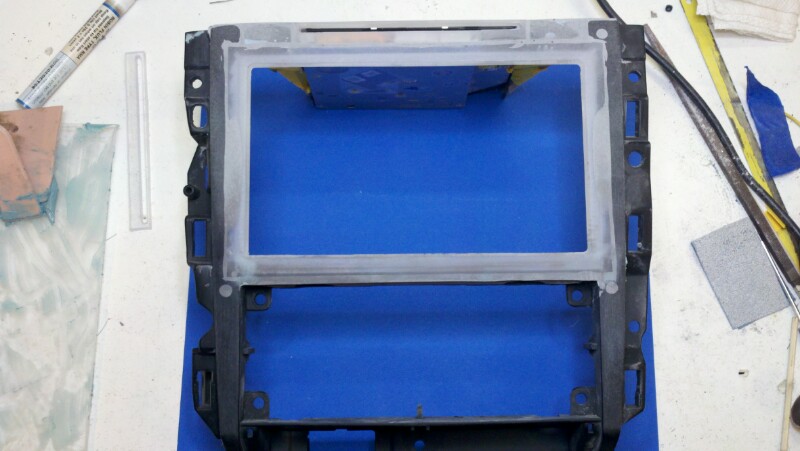
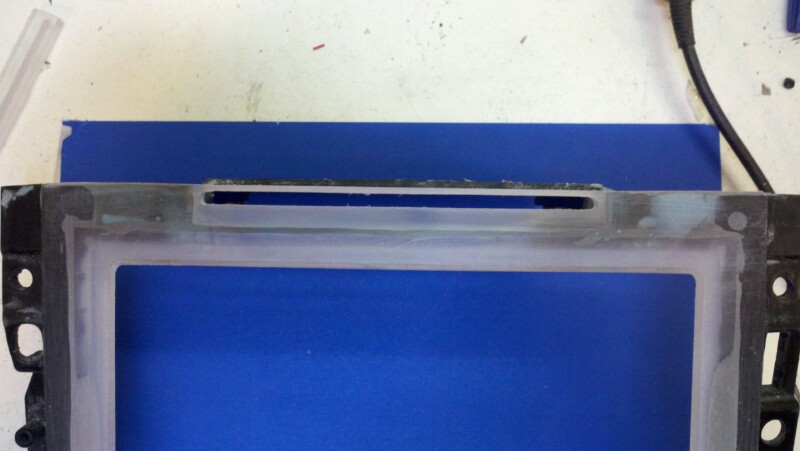
Pics of the dash trim cut out:

Image

Image

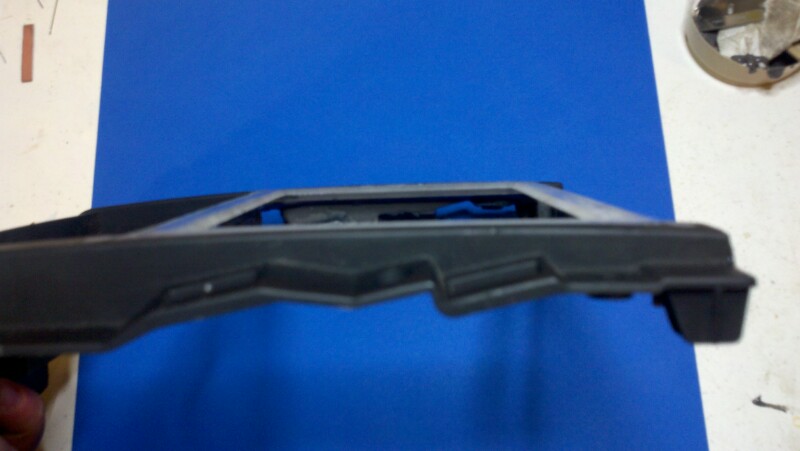
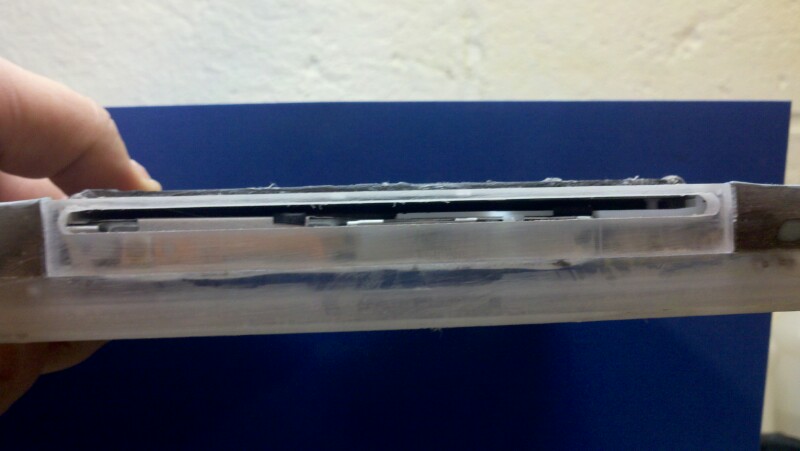
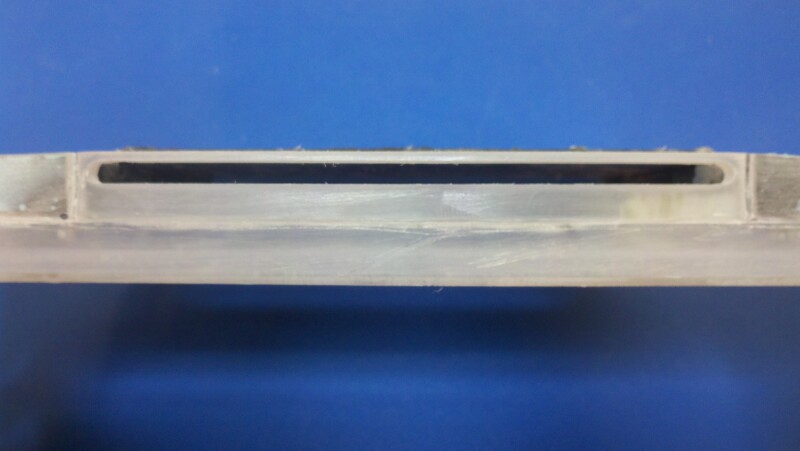
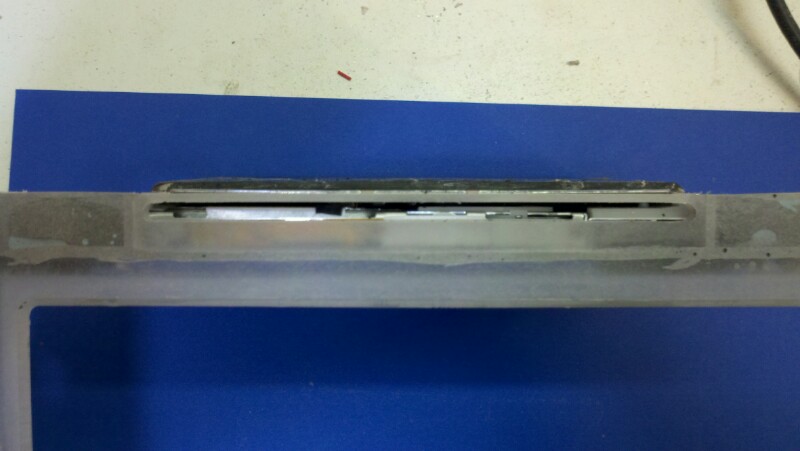
I broke the monitor bezel when I cut the bottom (button section) off. Take it from me, you should not try to nip one of these off on the chop saw
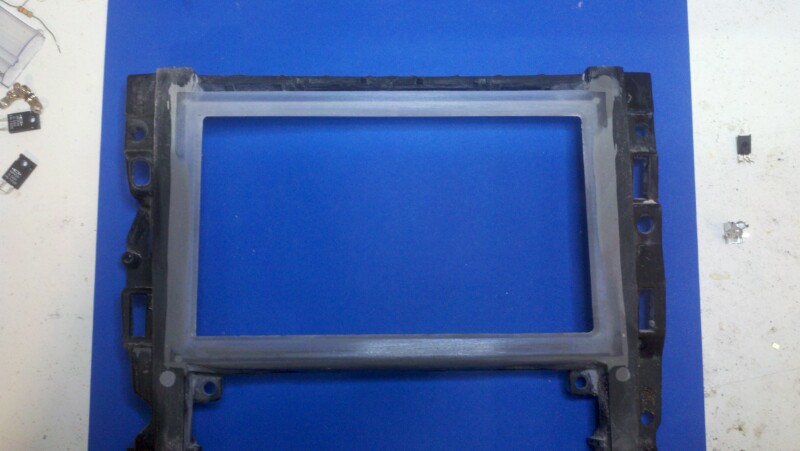
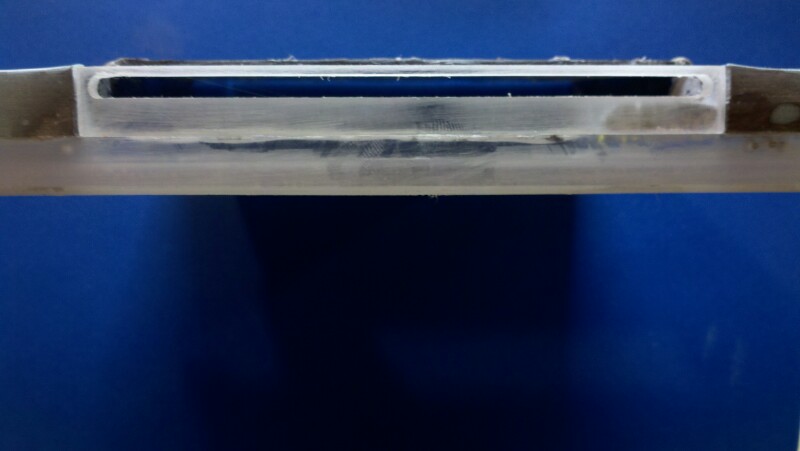
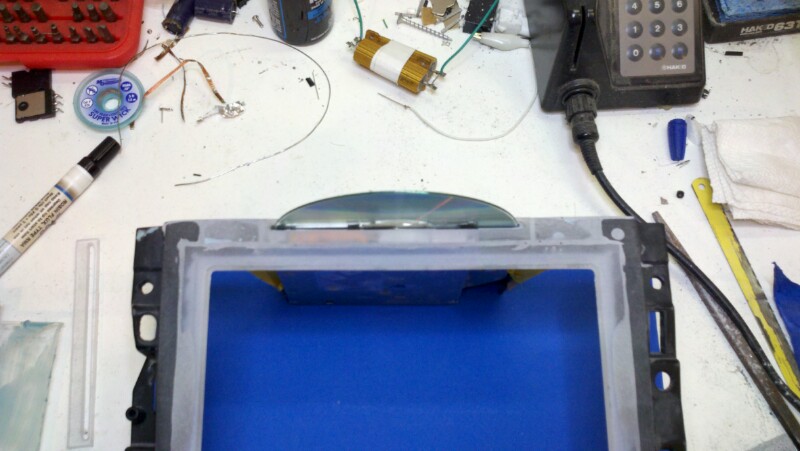
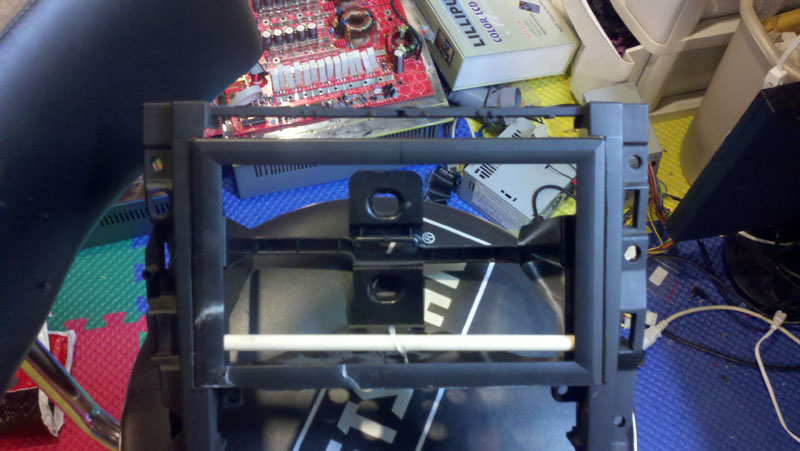
 :D Anyhow, that is why there is a dowel rod in and some white patches on the bezel, I had already patched it up with super glue :D

Test fit:

Image

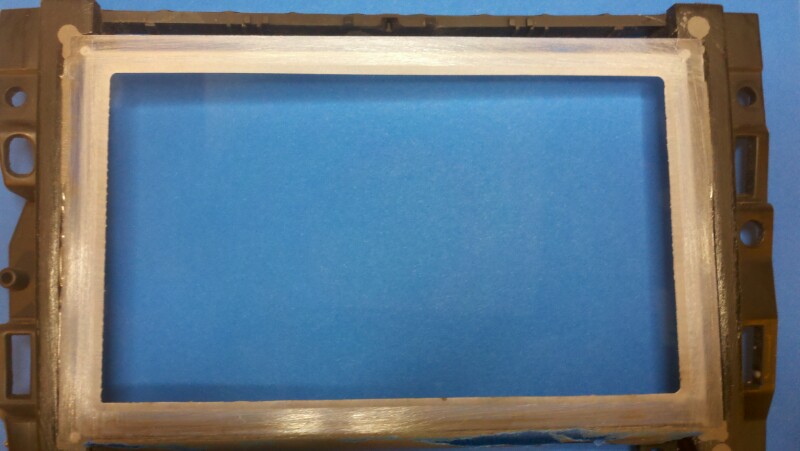
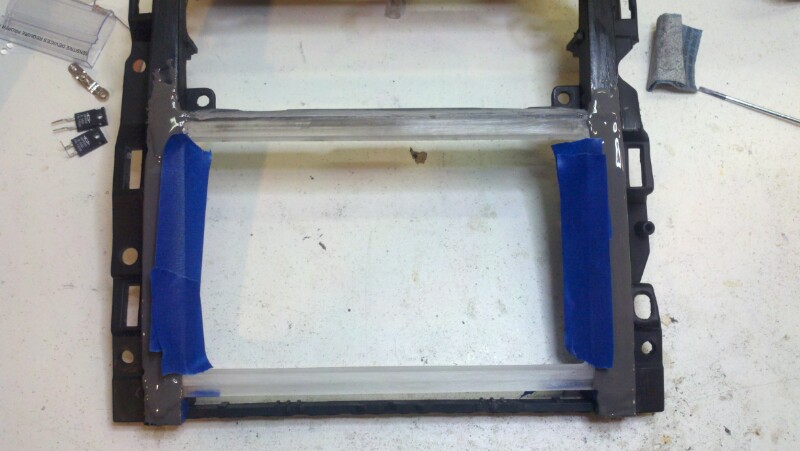
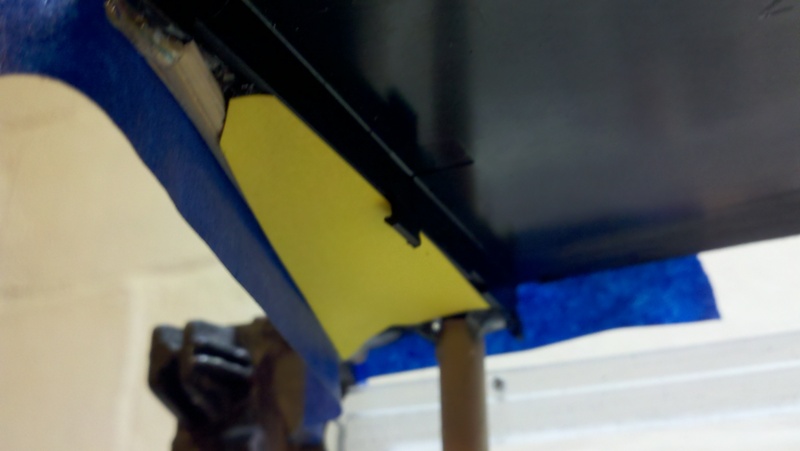
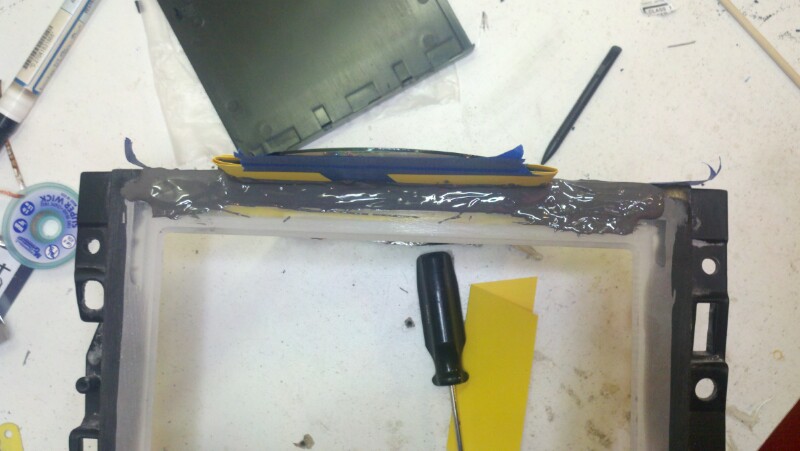
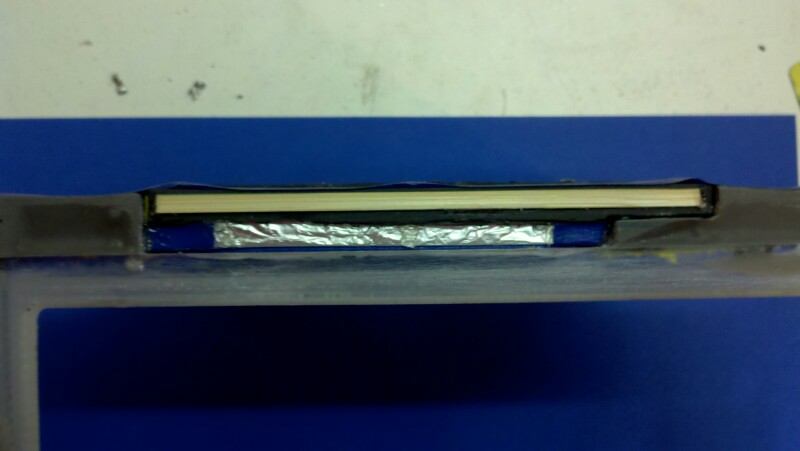
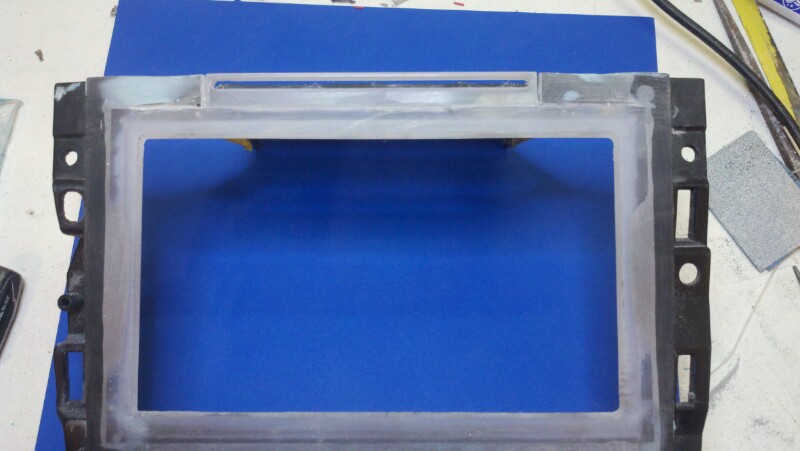
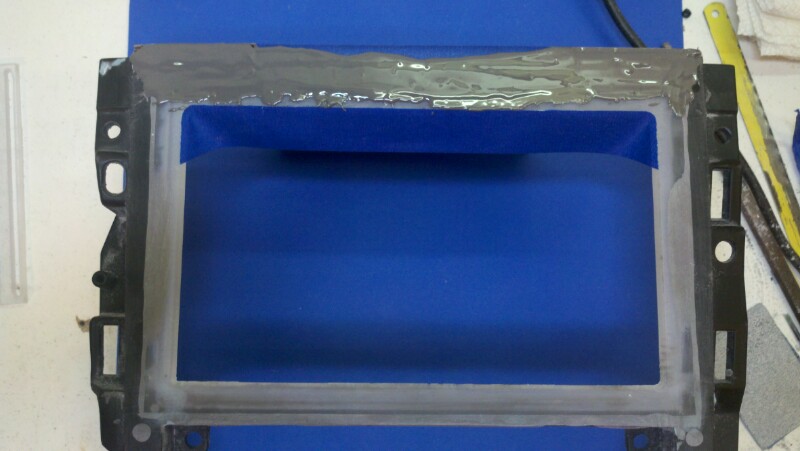
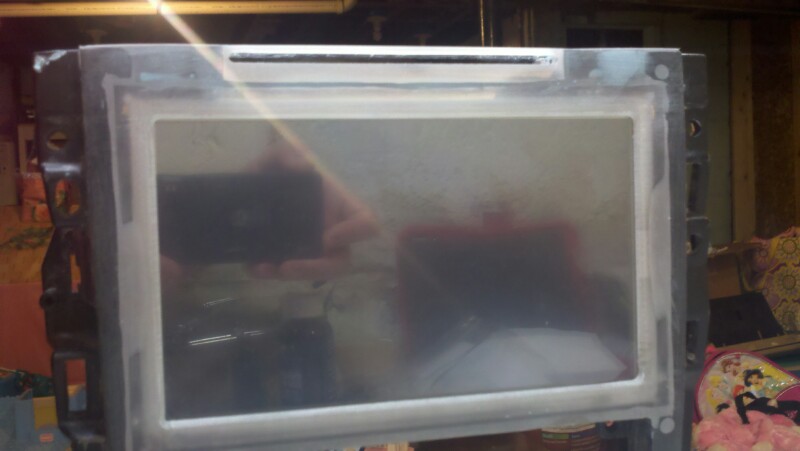
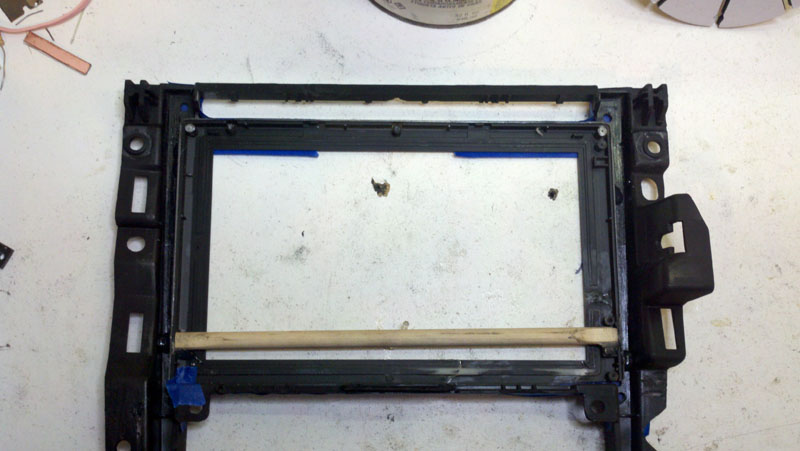
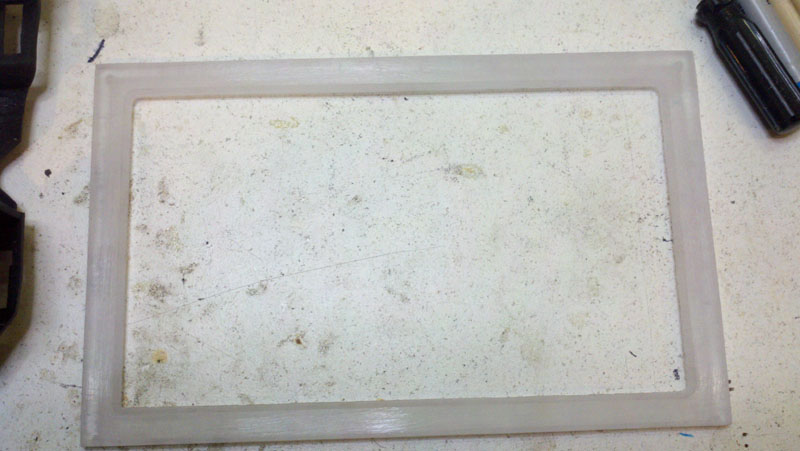
Taped up, sanded w/ 80 grit and ready for epoxy. The 4 holes are because I was not able to sand up in those tiny areas. I drilled them and countersunk the outside of the hole, the idea being that the epoxy will flow through, fill the countersink and can be sanded flush before refinishing.

Image

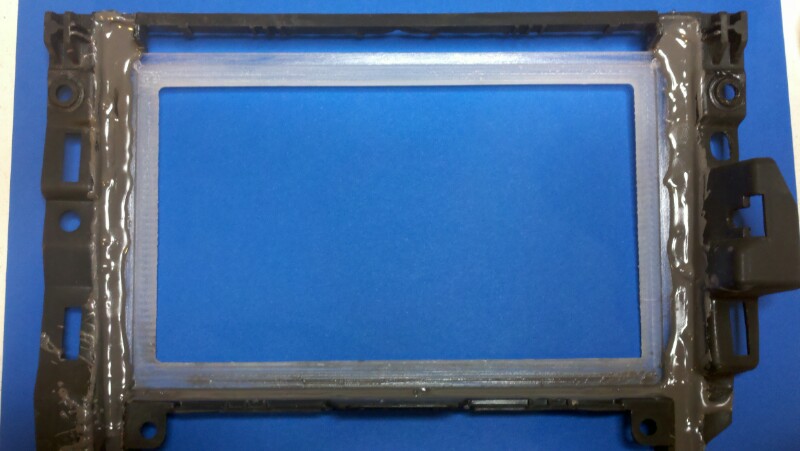
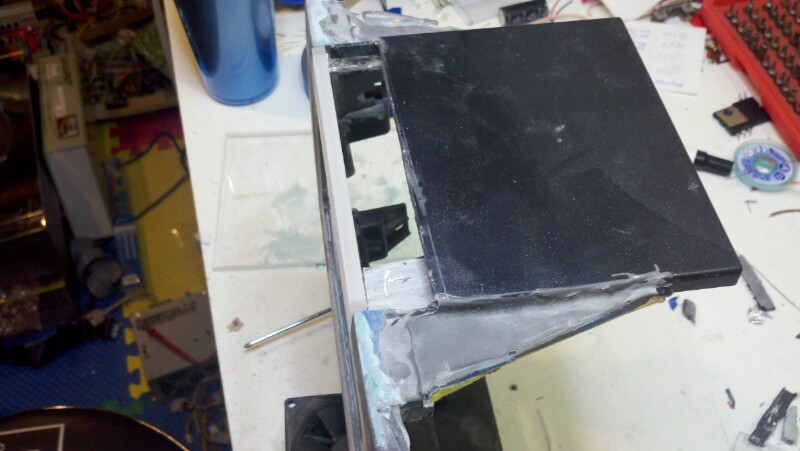
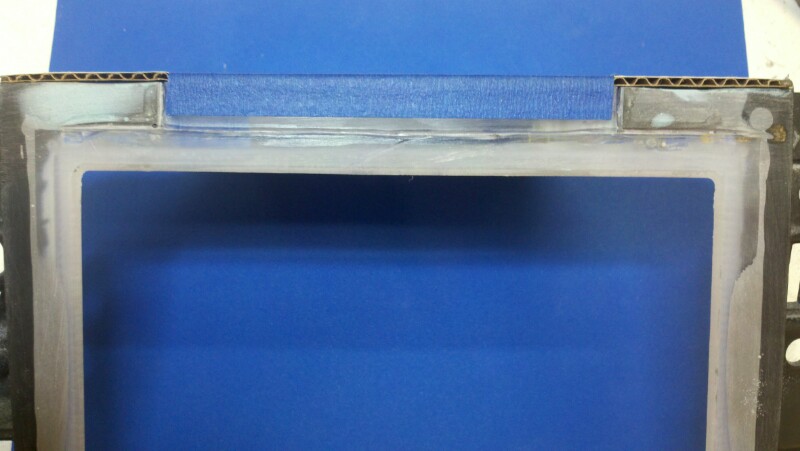
And then we have a stunning failure! I knew better, but I did this anyway-- I read on MP3 car that you should heat gun the epoxy to get it to flow better. I thought this might not be a great idea, I thought it might make the epoxy cure to fast, I did not foresee the actual problems I caused... I melted the shit out of the bezel. Man was I pissed at myself! I thought I smelled hot plastic at one point, and it never crossed my mind to look at the bezel itself...

Image

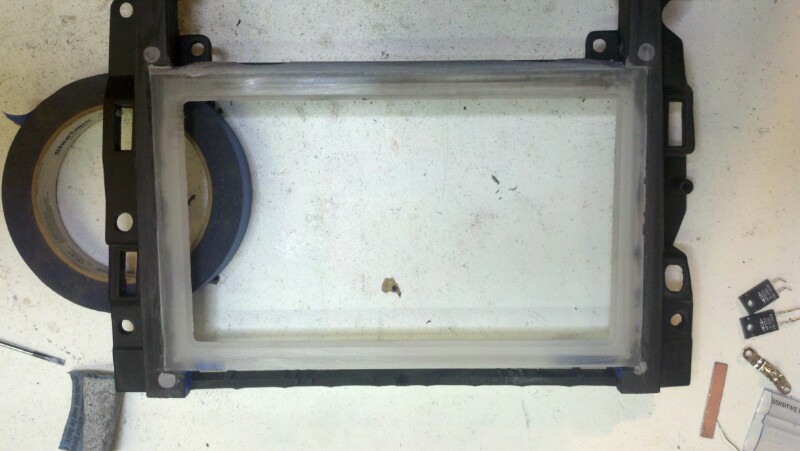
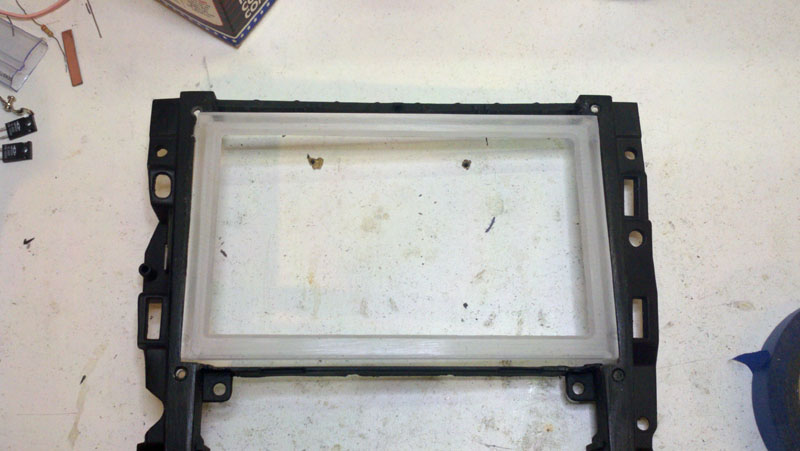
So, I did what anyone would do. I wrote to lilliput asking if I could buy a new case, then I said, "self, you have a cnc mill, make a new bezel". So, tonight I cut a new bezel. I made it out of polycarbonate because I had it around. It should work out just fine in the end. It is beveled around the inside of the monitor cutout. I did check the fit of the monitor itself before I started epoxying it in place.

Image

In place before tape, just tacked with 4 spots of hot glue.

Image

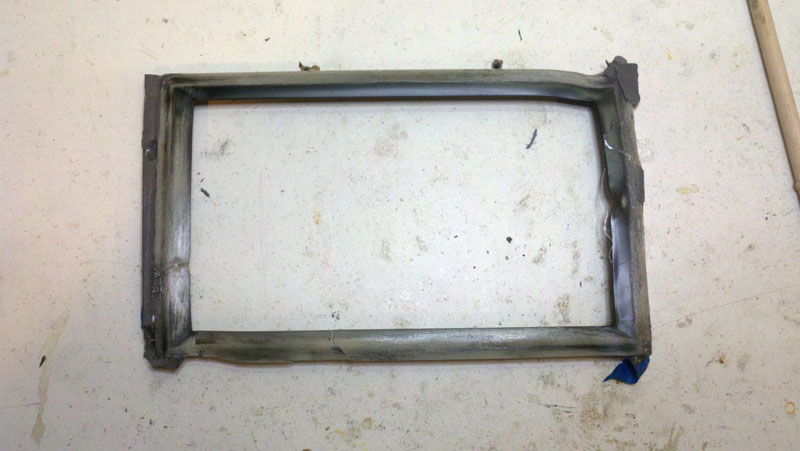
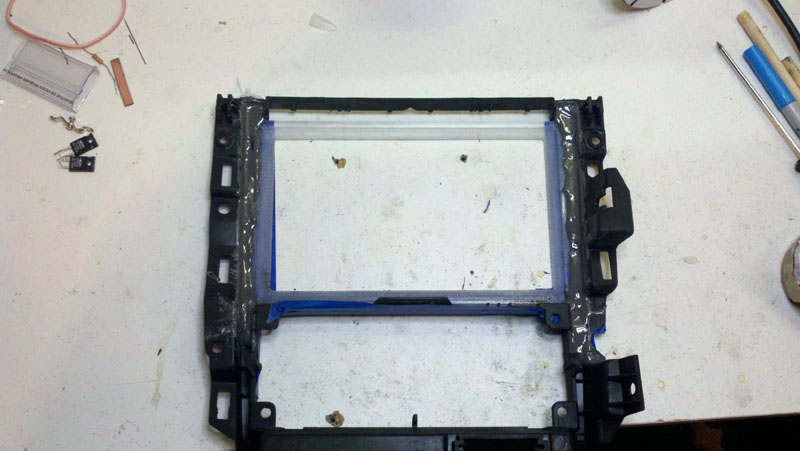
Epoxy poured, no heat gun this time, it will have to wait over night to dick with it and see how it is coming along.

Image

Later,
Jason
M: M100, M44 for a custom amp project
Zx: Zx500, Zx450, Black Zx350
ZxTi: 4 Zx600Ti's, 1 Zx400Ti
Ti: 5 800.1's & 900.7 for a custom amp project. 1 1200.1, 1 1000.2
Tantrum: 2 1200.1's, 1 600.4, 1 500.2
XS: XS6600
User avatar
Jacampb2
Mad Scientist
Posts: 1562
Joined: Sat Apr 19, 2008 11:57 pm
Location: Beaverton 48612

Post by Jacampb2 »

The epoxy has set, I removed most of the tape. It is looking good so far. The next step is to cut a v grove on the front side where the bezel mates with the factory trim and fill that with epoxy as well. Then lots of sanding and it should be ready to refinish.


Here are the pics:

Image

Image

Image

later,
Jason
M: M100, M44 for a custom amp project
Zx: Zx500, Zx450, Black Zx350
ZxTi: 4 Zx600Ti's, 1 Zx400Ti
Ti: 5 800.1's & 900.7 for a custom amp project. 1 1200.1, 1 1000.2
Tantrum: 2 1200.1's, 1 600.4, 1 500.2
XS: XS6600
User avatar
stipud
Voltage Ohms
Posts: 14719
Joined: Sat Nov 26, 1983 4:00 am
Location: Burnaby, BC
Contact:

Post by stipud »

Ah, to have a CNC of my own... you lucky bugger :lol:

How's the bootup time on your carputer? That's basically my main issue with them. I am very impatient! I would have probably gone with a smaller SSD drive to run off of, and carry an external USB drive for carrying the music collection if need be.
User avatar
Jacampb2
Mad Scientist
Posts: 1562
Joined: Sat Apr 19, 2008 11:57 pm
Location: Beaverton 48612

Post by Jacampb2 »

I don't know if you have dicked with win 7 at all, but it cold boots very fast. I intend to do what most everyone else does with them though, and just hibernate it instead of shutting it down. I haven't timed it, but a seat of the pants guess is that it comes out of hibernation in less than 10 seconds. In contrast, my Eclipse 7200MkII takes about 3-4 seconds to initialize and start playing music after I start the car. If it is set to USB source it can actually take longer than 10 seconds before it starts playing.

I was going to cram the MOBO behind the monitor in the DD opening, but it looks incredibly tight if I try to. After I get the screen mounted and it's controller board mounted in the DD compartment I will see how much room I have left to work with. If there is no way to squeeze the thing behind the monitor, I am going to put it in the glove box which is also a rinky dink affair in this car.

I'm torn between using the on board sound of the PC. I am fairly sure I am going to roll with one of my clarion DVH920 dolby/dts processors that I converted to toslink. I think I will ensure myself the best available signal quality if I take that route.

More to come later, I'm back to work over the weekend, but I will be tinkering with this off and on through the winter.

Later,
Jason
M: M100, M44 for a custom amp project
Zx: Zx500, Zx450, Black Zx350
ZxTi: 4 Zx600Ti's, 1 Zx400Ti
Ti: 5 800.1's & 900.7 for a custom amp project. 1 1200.1, 1 1000.2
Tantrum: 2 1200.1's, 1 600.4, 1 500.2
XS: XS6600
ttocs
the Floor Sweeping Hack with Golden Ears
Posts: 14785
Joined: Fri Dec 19, 2008 9:53 pm

Post by ttocs »

my new laptop does with 7 boots up in 30 secs from a dead power off situation, in sleep mode it is even faster.
what else can I say I am a grumpy asshole most of the time.
User avatar
Jacampb2
Mad Scientist
Posts: 1562
Joined: Sat Apr 19, 2008 11:57 pm
Location: Beaverton 48612

Post by Jacampb2 »

I got a little bit more done before heading into work tonight, I am just now getting a few free minutes to post...

Pics of the joints on the front "v'd" out, it is hard to see in the picture, if I had realized the polycarbonate would be so tough to photograph I might have used something else!

Image

The epoxy is down in this picture, I laid it on pretty thick since it takes almost a full day to dry, I would rather do more sanding then have to spend 3 days putting coats down. I had to tape the inside bevel because it looked like the epoxy was going to flow down the edge. I want to try to refrain from having to sand that bevel or inner edge unless there is no other option. Any material removed there is going to be glaringly obvious.

Image

Later,
Jason
M: M100, M44 for a custom amp project
Zx: Zx500, Zx450, Black Zx350
ZxTi: 4 Zx600Ti's, 1 Zx400Ti
Ti: 5 800.1's & 900.7 for a custom amp project. 1 1200.1, 1 1000.2
Tantrum: 2 1200.1's, 1 600.4, 1 500.2
XS: XS6600
User avatar
The Golden One
Quarantined
Quarantined
Posts: 717
Joined: Sat May 29, 2010 3:58 pm
Location: Tinkle Town T,N

Post by The Golden One »

here's an example of how to get your computer to start up faster this is for xp but they have them for windows7 to http://www.youtube.com/watch?v=rKPtoiaBjog there are some more advanced way's but you could fubar you computer and have to install your xp or window's 7 again.
User avatar
Rold Gold
Dirty Harry
Posts: 5685
Joined: Sat Jan 26, 2008 11:53 pm
Location: Oregon Grown

Post by Rold Gold »

DEEZAM Jason.........
That's gonna be kickass when yer done. Can't wait to see more pix.
Those tender little burgers with them little, itty-bitty grilled onions that just explode in ya mouth like flavor crystals every time you bite into one.. just makes me want to burn this muthafuka down.... Come on, Pookie, let's burn this muthafuka down!!!
User avatar
Jacampb2
Mad Scientist
Posts: 1562
Joined: Sat Apr 19, 2008 11:57 pm
Location: Beaverton 48612

Post by Jacampb2 »

Not much here, but the epoxy has set. I'm still at work, but I'll get it sanded out as soon as I'm off for a few days.

later,
Jason
Attachments
1290938169-picsay.jpg
1290938169-picsay.jpg (61.65 KiB) Viewed 10510 times
M: M100, M44 for a custom amp project
Zx: Zx500, Zx450, Black Zx350
ZxTi: 4 Zx600Ti's, 1 Zx400Ti
Ti: 5 800.1's & 900.7 for a custom amp project. 1 1200.1, 1 1000.2
Tantrum: 2 1200.1's, 1 600.4, 1 500.2
XS: XS6600
User avatar
Jacampb2
Mad Scientist
Posts: 1562
Joined: Sat Apr 19, 2008 11:57 pm
Location: Beaverton 48612

Post by Jacampb2 »

Did a quick sanding job on it today after I got up. It's coming along pretty good. I may switch to body filler for the last few top skim coats. The thing is structurally solid now, I'm thinking that body filler should hold up without cracking at this point.

I also plan to put the slot load laptop drive centered above the monitor. I need to work out a way to mount it and do a nice looking integrated slot above the screen so there is still a quite a lot to do on the trim piece.

Here is the pic from this afternoon.

Image

Later,
Jason
M: M100, M44 for a custom amp project
Zx: Zx500, Zx450, Black Zx350
ZxTi: 4 Zx600Ti's, 1 Zx400Ti
Ti: 5 800.1's & 900.7 for a custom amp project. 1 1200.1, 1 1000.2
Tantrum: 2 1200.1's, 1 600.4, 1 500.2
XS: XS6600
User avatar
12voltjunky
Posts: 565
Joined: Tue Dec 15, 2009 5:10 pm
Location: Atlanta, GA

Post by 12voltjunky »

Rold Gold wrote:DEEZAM Jason.........
That's gonna be kickass when yer done. Can't wait to see more pix.
i second that
1- Zx 400 Ti
1- Ti 600.2
1- Ti 500.4 (resurrected by valeks1)
2- Ti 500.4
2- Ti 1000.2
2-Ti RMD, Lpl, PG 1/0 Ga
Ti 6.5 comps, Ti 5x7 coaxials
Thumper88
Posts: 1122
Joined: Tue Feb 20, 2007 9:03 pm
Location: Michigan

Post by Thumper88 »

Following this thread...

Was looking at putting a puter together, they even make double din itx enclosures, but I found a good deal on a avic-z120bt with all the amenities.
User avatar
Jacampb2
Mad Scientist
Posts: 1562
Joined: Sat Apr 19, 2008 11:57 pm
Location: Beaverton 48612

Post by Jacampb2 »

Thanks guys! Those DD pc enclosures are for the nano and pico ITX boards, quite a bit smaller than the micro ITX, even though those are pretty crazy. The micro ITX is 6.7" square, so in theory it is small enough to fit in a DD opening, but if your dash is tight like mine you may not be able to get to all the connectors.

I made a tiny bit more progress today, I may get further tonight, but in all likely hood I am done with it 'till tomorrow.

So, without further ado, here are the pictures :)

Test Fit with video to make sure I have it square and centered evenly (there is a little extra wiggle room in my bezel)

Image

Couple of shots of the MOBO, the first pic is a shot with the 2.5" laptop HD for size reference. Second is just to show how much is built into this little guy-- it has on board wireless N, bluetooth, USB 3.0, E-sata, digital video and optical audio, coaxial digital audio and analog audio out.

Image

Image

Later,
Jason
M: M100, M44 for a custom amp project
Zx: Zx500, Zx450, Black Zx350
ZxTi: 4 Zx600Ti's, 1 Zx400Ti
Ti: 5 800.1's & 900.7 for a custom amp project. 1 1200.1, 1 1000.2
Tantrum: 2 1200.1's, 1 600.4, 1 500.2
XS: XS6600
User avatar
Jacampb2
Mad Scientist
Posts: 1562
Joined: Sat Apr 19, 2008 11:57 pm
Location: Beaverton 48612

Re: The beginning's of my carputer install

Post by Jacampb2 »

Well, I worked on it a little bit more tonight. Currently I am working on mounting the DVD-RAM drive. I was not really sure how I was going to pull this off, but I think I am of the right track. I used half of a el-cheapo china made external slim CD rom case. I drilled a few holes in the side of it for mounting points, cut it up more than a little and then tacked it in place with hot glue. I cut some really small dowels (actually bamboo barbecue skewers) and used them for some more supports. Hot glued them in place again, glued some poster board on the bottom to make a solid base for the epoxy and then mixed up a batch and filled the triangular areas and the first bit along the front edge. I still have to figure out how to make a nice looking slot in the face, I don't intend to use the actual faceplate for the drive, just want a nice factory looking slot so it looks like it was meant to be.

Anyhow, the pics aren't that great-- was taking them with my Droid and it was freaking out about it for some reason, in fact, I am missing two that I took all together???

Image

Image

Later,
Jason
M: M100, M44 for a custom amp project
Zx: Zx500, Zx450, Black Zx350
ZxTi: 4 Zx600Ti's, 1 Zx400Ti
Ti: 5 800.1's & 900.7 for a custom amp project. 1 1200.1, 1 1000.2
Tantrum: 2 1200.1's, 1 600.4, 1 500.2
XS: XS6600
User avatar
bretti_kivi
Shutterbug
Posts: 1595
Joined: Tue Aug 26, 2008 1:06 pm
Location: Päijät-Häme or Uusimaa

Re: The beginning's of my carputer install

Post by bretti_kivi »

looks pretty good from here - the bezels are a pain no matter what.

What interface and user interface (i.e. trackball, touchscreen...) are you going to use?

Bret
User avatar
Jacampb2
Mad Scientist
Posts: 1562
Joined: Sat Apr 19, 2008 11:57 pm
Location: Beaverton 48612

Re: The beginning's of my carputer install

Post by Jacampb2 »

The interface is going to be mainly via the lilliput touch screen. I also have a micro blue tooth keyboard I bought for my Droid X that will work with the PC bluetooth if I need the actual keyboard functionality. I'm either going to run RideRunner front end or Centrafuse. Riderunner is free and fairly decent, Centrafuse costs a fair bit of change, but it s really well refined and looks a lot like the front end you would find in a factory or aftermarket DD head unit.

I made a bit more progress today, I poured a bunch more epoxy. You can't see it that well in the pics, but there is a slim slot load drive under all the foil, tape, poster board and epoxy. The idea is to fill the voids around the drive so that I can start finishing off the bezel. Like I mentioned early I am making an attempt at flushing it with just a slot. I have a DVD wrapped with some poster board and tape. I put as much around it as I could and still jam it in the drive. I sealed it up to the drive slot as best I could-- this particular drive is one that I don't mind sacrificing if the epoxy leaks in, but it should be sealed well enough. I should know for sure tomorrow!

Here are the pics:

Image

Image

Image

Later,
Jason
M: M100, M44 for a custom amp project
Zx: Zx500, Zx450, Black Zx350
ZxTi: 4 Zx600Ti's, 1 Zx400Ti
Ti: 5 800.1's & 900.7 for a custom amp project. 1 1200.1, 1 1000.2
Tantrum: 2 1200.1's, 1 600.4, 1 500.2
XS: XS6600
User avatar
Jacampb2
Mad Scientist
Posts: 1562
Joined: Sat Apr 19, 2008 11:57 pm
Location: Beaverton 48612

Re: The beginning's of my carputer install

Post by Jacampb2 »

Well, the slot did not come out as hoped for. When I pulled the drive out, it was a lot tighter than expected, and first off I broke the upper portion of the slot, where it was very thin, right off. I wasn't to worried about it, I was going to make a new top part of the slot out of some scrap aluminum. It is pretty unlikely that you will even be able to see the tip of the slot, this is going to be right up to the edge of the dash, and it overhangs the radio bezel by probably close to half an inch.

I put the drive in w/ none of the stuff covering it up anymore, and I really didn't like how the slot was coming. It needs a felt back like the factory trim plate, that makes it look a lot better. So, on to plan b, I cut the stock trim plate in half and wrapped the actual drive I was going to use in foil. I put the trim piece on that with just small dabs of hot glue. I started modifying the work I had already done to fit the slot portion of the face and flush it in with rest of the bezel. I had to file away a good portion of the epoxy that was there, and in the process I broke it away from the polycarbonate piece. Turns out I didn't have a good bond, and it is fortunate I ran into these problems or it would probably have cracked down the road and really pissed me off.

I ended up re-doing this with my good drive-- hopefully I don't ruin it. Bellow in the pics you will see what I am shooting for this time. hopefully it will work out better. I might get a chance to screw with it a bit tomorrow, but I am off to work midnights tomorrow night, so I may not get free time being Christmas eve and all...

Image

I cut a groove in the polycarbonate to help lock the epoxy into the rest of the piece. This edge is where it broke loose last time around.

Image

The fit with the HVAC controls turned out good, it still needs a little bit of work to get the lines perfect, but it is close

Image

Here is a shot of what I filled. The slot half of the trim piece has a piece of dowel split in half and lightly glued in place. The plan is to sand it all with the dowel in place, when all the finish sanding is done, pop the dowel out and hopefully have a decent slot with minimal finishing that needs done.

Later,
Jason
M: M100, M44 for a custom amp project
Zx: Zx500, Zx450, Black Zx350
ZxTi: 4 Zx600Ti's, 1 Zx400Ti
Ti: 5 800.1's & 900.7 for a custom amp project. 1 1200.1, 1 1000.2
Tantrum: 2 1200.1's, 1 600.4, 1 500.2
XS: XS6600
ttocs
the Floor Sweeping Hack with Golden Ears
Posts: 14785
Joined: Fri Dec 19, 2008 9:53 pm

Re: The beginning's of my carputer install

Post by ttocs »

that slot had me concerned and wondering why you didn't just machine one out.

I can't help but think if you were to sand the edge of the plexi nice and rough and lit it from the back that you couldn't edge-light that screen for some extra points. Put a switch on it of course and if you were do machine the plexi for the slot, you could also light up the slot....
what else can I say I am a grumpy asshole most of the time.
User avatar
Jacampb2
Mad Scientist
Posts: 1562
Joined: Sat Apr 19, 2008 11:57 pm
Location: Beaverton 48612

Re: The beginning's of my carputer install

Post by Jacampb2 »

ttocs wrote:that slot had me concerned and wondering why you didn't just machine one out.

I can't help but think if you were to sand the edge of the plexi nice and rough and lit it from the back that you couldn't edge-light that screen for some extra points. Put a switch on it of course and if you were do machine the plexi for the slot, you could also light up the slot....

Ha! Nice of you to mention that. About a day and a half after I had that new bezel epoxied in and was mocking up drive locations I thought the same damn thing! If I had planned it out far enough I would have made that polycarbonate piece the ~1" taller machined the slot and had it all in one frigging piece. I figured it was more work to cut it all back out at that point though, so I figured it would be a "worse case scenario" type solution if it came down to it. As for lighting it, that never crossed my mind. That would be pretty cool, but it takes a lot of sanding to finish this and it would take a shit ton of polishing to get the poly back to clear. I probably wouldn't ever have it lit up either, so it wasted work to me. If I have to cut it all back out again, I promise I will consider it though :)

Later,
Jason
M: M100, M44 for a custom amp project
Zx: Zx500, Zx450, Black Zx350
ZxTi: 4 Zx600Ti's, 1 Zx400Ti
Ti: 5 800.1's & 900.7 for a custom amp project. 1 1200.1, 1 1000.2
Tantrum: 2 1200.1's, 1 600.4, 1 500.2
XS: XS6600
User avatar
Jacampb2
Mad Scientist
Posts: 1562
Joined: Sat Apr 19, 2008 11:57 pm
Location: Beaverton 48612

Re: The beginning's of my carputer install

Post by Jacampb2 »

Well, I had an update to go between today's and the previous one here, but my camera ate the pictures, so you will have to be without some pics.

Yesterday I sanded out the epoxy I laid down to see how my integration of the oem faceplate went. It actually started out really good, but I got a bit carried away sanding out the demarcation line between the slot and the filler and I butchered it pretty good. By the time I realized there was no fixing it, it was going to need a lot more filler and hand shaping to get it right again, so I once again scrapped it and started over. I honestly was about to ditch the DVD drive all together...

So, on to plan... uh... c I guess??? Any one keeping track? Anyhow, I drew a slot and filler piece up in CAD, did the CAM work and ran it off on my CNC mill. This piece isn't perfect, but it is pretty damned good, I can live with it. It still needs a felt backer, and lots of filler after the glue sets. It is glued along it's lower length with loctite 404, basically just industrial strength super glue. Once it sets I am going to "v" out all the joints and fill it with epoxy, then sand it out and go back to body filler. You may notice in some of these pics there is a light blueish tint to some of the epoxy now. I already did one coat of body filler before I scrapped the last drive trim.

Here are the pics:

Image

Image

Image

Later,
Jason
M: M100, M44 for a custom amp project
Zx: Zx500, Zx450, Black Zx350
ZxTi: 4 Zx600Ti's, 1 Zx400Ti
Ti: 5 800.1's & 900.7 for a custom amp project. 1 1200.1, 1 1000.2
Tantrum: 2 1200.1's, 1 600.4, 1 500.2
XS: XS6600
User avatar
Jacampb2
Mad Scientist
Posts: 1562
Joined: Sat Apr 19, 2008 11:57 pm
Location: Beaverton 48612

Re: The beginning's of my carputer install

Post by Jacampb2 »

It's a two-for today! The glue set up and I had some more free time so I went and grooved the joints and laid down more epoxy. With any luck the way I got it taped/masked I will level out the top as well as fill all the joints.

Here are the pictures, I'm off to work on day shift tomorrow and am working through the weekend. It will be next week sometime before I get to it again. With any luck it will come out right this time because I would really like to move on to start mounting the electronics.

Image

Image

Image

Image

Later,
Jason
M: M100, M44 for a custom amp project
Zx: Zx500, Zx450, Black Zx350
ZxTi: 4 Zx600Ti's, 1 Zx400Ti
Ti: 5 800.1's & 900.7 for a custom amp project. 1 1200.1, 1 1000.2
Tantrum: 2 1200.1's, 1 600.4, 1 500.2
XS: XS6600
User avatar
Jacampb2
Mad Scientist
Posts: 1562
Joined: Sat Apr 19, 2008 11:57 pm
Location: Beaverton 48612

Re: The beginning's of my carputer install

Post by Jacampb2 »

Finally! A ray of hope!

Took a few minutes this morning and sanded out the epoxy that I laid down last week. I finally have something that resembles the picture in my head. I can definitely live with this result. The pics bellow all have the drive installed, a felt backer for the slot and it will be as close to perfect as I am likely to get it. So, at this point, I am looking at a bit more filler for the bezel, then paint and it is on to mounting electronics. Actually, I will probably do the filler now and wait on paint until it is ready to go in the dash. I don't want to spend a bunch of time on paint and then scuff it up while fabricating the mounts/enclosure.

So, tell me what you think? I am considering mounting a single led centered in the bottom of the slot. I would current limit it pretty low and keep it dim, or maybe even find the "media in" switch in the drive and light the LED only when the drive is empty... Just thinking out loud, give me your thoughts.

Here are the pics:

Image

Image

Image

Image

Later,
Jason
M: M100, M44 for a custom amp project
Zx: Zx500, Zx450, Black Zx350
ZxTi: 4 Zx600Ti's, 1 Zx400Ti
Ti: 5 800.1's & 900.7 for a custom amp project. 1 1200.1, 1 1000.2
Tantrum: 2 1200.1's, 1 600.4, 1 500.2
XS: XS6600
oldschoolfan
Posts: 897
Joined: Wed Nov 25, 2009 11:08 am
Location: Burb of Detroit

Re: The beginning's of my carputer install

Post by oldschoolfan »

It looks super sweet! I really like very subtle accent lights, functional or not. Go for it!
User avatar
Jacampb2
Mad Scientist
Posts: 1562
Joined: Sat Apr 19, 2008 11:57 pm
Location: Beaverton 48612

Re: The beginning's of my carputer install

Post by Jacampb2 »

Thanks! I guess I can put it in and if I hate it I can always disconnect it. No real harm there...

I got some more done this afternoon. Put down another coat of body filler and sanded it out. The pin holes all look to be filled now, it looks pretty good to me.

Image

Image

Then I started test fitting the electronics. The plastic cage is just the factory Double din mounts. I split this part from the bezel early on to make things easier to work on. I originally thought the screen was going to interfere with putting it back on and was planning to fabricate mounting stuff from scratch, but a little fine tuned epoxy removal on the back side and it went back together with very little problem. The plan here is to cut some .125" aluminum "shelves" for lack of a better explanation. there will be a solid aluminum bottom plate for both the monitor electronics and for the MOBO. I am going to do the CAD/CAM work later tonight for the mounting points for both boards, and drill them on the CNC. I have all the standoffs that I will need to mount the boards properly.

The pics are just for mock up. At this point, it looks like I will be able to mount the hard drive directly underneath the MOBO and probably the DC-DC supply as well. I have not yet figured out what is going to happen with PCI-e video card, I have a flexible slot extender, and I have mocked up a few locations, but it is to difficult to hold the MOBO and try and juggle that card and extender around. If there were enough room behind the DD opening I could just plug it straight in it's slot, but it's to tight in my dash, the heat sink would hit the heater core plenum behind the dash. Anyhow, I will make the board mounts first, and then figure out the video car once things are better contained.

On a side note, there is about an inch between the CPU fan and the bottom of the DVD drive. I tried to get a decent shot of it bellow. Does anyone have any input on whether or not this will be enough room for reasonable cooling? I can go lower with the MOBO, but it will mean major surgery of the DD mount and a lot more fab work to get the skeleton that will remain to support all the hardware.


Image

Image

Image

Image

Later,
Jason
M: M100, M44 for a custom amp project
Zx: Zx500, Zx450, Black Zx350
ZxTi: 4 Zx600Ti's, 1 Zx400Ti
Ti: 5 800.1's & 900.7 for a custom amp project. 1 1200.1, 1 1000.2
Tantrum: 2 1200.1's, 1 600.4, 1 500.2
XS: XS6600
User avatar
bretti_kivi
Shutterbug
Posts: 1595
Joined: Tue Aug 26, 2008 1:06 pm
Location: Päijät-Häme or Uusimaa

Re: The beginning's of my carputer install

Post by bretti_kivi »

that should just mean your DVD drive will get warm. I don't see an issue, there will be air movement.

That slot looks rather good.

Bret
Post Reply